Showing posts with label bagmaking. Show all posts

Saturday, June 07, 2025

MAKING A BAG

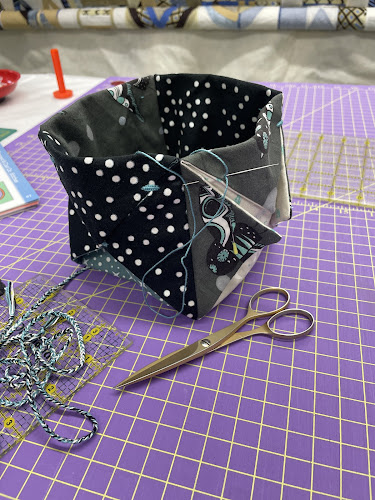
I was watching Making Zen, a free for 24 hours limited series of classes online, when I saw this bag, Japanese Puzzle Pouch.  I had to make one.  I've been working on it. The 'Worm' stitch (Sue Spargo calls it 'Double Cast On') was giving me trouble and I kept doing it wrong.  I had to get out Sue's handy instruction book, Creative Stitching, to figure it out.  Once I did that it was easy.

It's not quite done yet.


Monday, July 22, 2019

MARKET BAG

Someone posted a pattern to make a Market Bag from charm squares.

Here's mine.  I used some 'cat' fabric charms I've had around for a while.  I put the  basic structure together and quilted it on my longarm, Eduard.


Friday, April 14, 2017

SECOND CAMDEN BAG

I know!  I said I'd never again make one of these bags.  But, I saw all the leftover pieces from the first bag and thought about how much money I spent on them.  I hate throwing away money.  

So, I made this smaller bag.

I knew where all the pitfalls were and managed to figure out an easier way to do it.  This bag ended up not being anywhere near as miserable to make.

I'm not real happy with the fabrics, but that's what I had to work with if the plan was to use up the leftovers.

I really like this bag.


Thursday, February 09, 2017

FINISHED THE BAG!

It took lots of angst, cussing, pain and frustration, but I got the bag finished today!

On Tuesday, we went to McLendon's Hardware and got some nylon screw rivets to attach the handles to the bag.  [I didn't like the instructions in the pattern, and came up with this plan]

The DH drilled holes into the plastic tubing that makes up the handles.


The first set of rivets, 3/4" long,was a little too long.  So, Wednesday I went back to hardware store and bought shorter ones.  They only had 1/2" and I was worried that they'd be too short since the tubing was 1/2".  So I also bought 5/8" in aluminum, which is what I ended up using.


So, I spent alot more money and bought alot more hardware than I needed.


I used one of DH's square punches (1/4") to punch a hole through the bag's side.  [You too can buy one of his punches thru Veritas or Lee Valley]


Then I attached the plastic tube covered with fabric to the bag with the rivets and washers.


Then the ends of the fabric tubes was pulled down and attached to the bag.  This was one of the most frustrating things I've ever done - trying to hand sew the final bit of fabric down.  Never again.


I almost gave up a couple of times, but after several hours over two days I persisted and won.  It may not be pretty, but it's done and it works.


DONE>


[I thought I might get Jelly to pose next to it to give some measure of it's size.  But, noooo, she thought I was trying to kill her or something.]


Friday, February 03, 2017

BOTTOM ATTACHED

The bottom of the bag had to all be sewn on by hand and it was not easy.

The inside had me struggling until I got fed up and turned it inside out.  (I was worried I might ruin the bag by doing this). 

Well...that was easy.


Inside out - just like sewing binding on.

It looked really cool when it was done.

I had done the outside first, and then when I sewed the inside bottom to the inside sides, it made it all kind of shift or something and the outside looks like this now.  But I really like it.  Weird.
I still don't know about the handles.  They have me confused.


Saturday, January 28, 2017

DIFFERENT APPROACH

Okay, since folding the doubled fusible in half, making four thicknesses, didn't work for me or my machine, I decided to go with just the doubled thickness.  

It won't look like the bag in the pattern, but it will be close.

My machine can do this, and the needle isn't gumming up and the thread isn't breaking.

Life is good.

I got the outside of the bag made, got binding on it and starting to attach the bottom.


Looking good!

I woke up thinking about a different way to make the bag that looks like the pattern, but without all that thickness.  I'll have to try it next time.


Thursday, January 26, 2017

I NEED A BIGGER BAG

I decided I needed a bigger bag - one that would hold a quilt, so I could take it with me and work on the binding and such.

I ordered a pattern.  I went to Jo-Ann's and bought fusibles.  I hate fusibles, they are so unquilt-like.  Stiff and artificial, not soft, warm and comforting as quilts should be.

But this is not going to be a quilt.

I got out my batiks and starting sorting through them.

I cut everything out and started to sew...

Here's the pattern with the beautiful bags on the cover.


First step, fusing the fabric to fusible batting.


Next step was to fold them in half and sew into tube-like strips.  Here's where the problems started.  This is four battings thick.  My machine didn't want to sew that.  It started skipping stitches.  It broke the thread and did all kinds of horrible things.  I changed needles, I used the biggest needle I had, I changed threads.  I gave up.
Things did not go well, I eventually decided to give up.  I would have to go buy more needles and thread, or something.

I've already spent too much money on fusibles, some of which I think are the wrong thing.  I sent away on Amazon for the brand names mentioned in the pattern.  I'll wait for them to get here and re-assess.