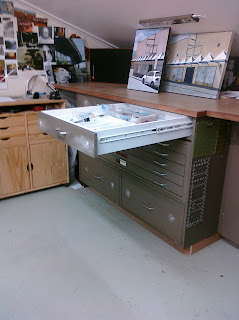
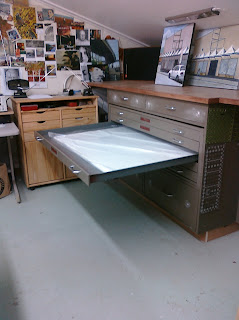
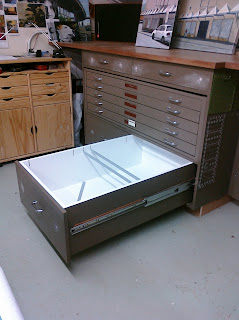
I put labels on the fronts of the drawers. Then I made some draw dividers to hold the spools of threads. I finished those up today. Not every drawer has dividers, mainly because there isn't much thread in those drawers, specifically the 5wt perle cotton and the 3wt perle cotton. I'm storing my boxes of floss in those at the moment.
Showing posts with label studio cabinets. Show all posts
Sunday, May 24, 2026
Tuesday, April 13, 2010
FABRIC STASH - END OF DAY TWO ORGANIZING
I spent the first day cleaning up from the construction. I got out the vacuum and went at it. I decided everything either had to have a home or it was going away. I started taking things downstairs and piling them up in Darrell's shop. It's only a matter of time until he puts a stop to that! But I will eventually do away with it all. We need a big garage sale this summer.
Anyway, I started taking fabric up that afternoon, but I didn't take any pictures.
This is where I stopped at the end of day two.
It all has to be re-folded and organized. It' kind of fun going through it all and remembering what I have. It's seems it's been a long time since I've been through it. I'm finding things I had forgotten I have. But, I need to start doing something with it all. I have little stacks of fabrics that I had some sort of plan for....but most of it I don't remember what exactly.
Saturday, April 10, 2010
STUDIO FABRIC STORAGE
The above picture is the finished project. Below are the process pictures. I did some research about systems for storing my fabric stash. I had criteria - I wanted to be able to see the fabric and get to it easily; I wanted the bins deep as possible because of the layout of the room's sloping ceiling. That end isn't really usable space without stooping down. I found this wire basket system through Organizeit.com. It was expensive, but simple to install - a choice of time or money. Being short of time, or should I say, Darrell being short of time, I decided to go for it.
Darrell built the simple four section box, and installed the 'ladders' that the baskets slide on. We found the other cabinets for free on Craigslist and he built toe-kicks for them, installed them and put new countertops of MDF edged with mahogany.
I spent several days painting the inside of the old cabinets white and painting the outsides, and putting shellac on the top of the counters.
At the last minute, I decided it might be fun to add some color - that short wall behind the new cabinets never really got painted properly. I stopped at Rodda on the way home one day and picked up some dark yellow (gold) paint - it's called 'Hacienda Clay'. I was surprised at how 'warm' it ended up being up against the already warm amber shellac. Oh, well.
Now I just have to lug all my fabric up there, re-fold it, and organize it.
No problem.
Wednesday, March 03, 2010
WRONG KIND OF PAINTING
Got a coat of primer yesterday and a coat of paint on the Fabric Case today. Needs one more coat of white, and then I'm going to push it into it's corner and wait for the husband to install the hardware for the baskets.
Boring! Turn the music up!
Friday, January 08, 2010
STUDIO CABINETS DONE! PRETTY MUCH!

Darrell installed the last two huge drawers on the bottom this morning. That means the studio cabinets on the south wall are pretty much done. I just have to put some touch-up paint on the front of the drawers where he put the screws in the drawer fronts. [you can see the fuzzy white patches in the pictures] I still need to put labels in all of the flat file drawers.

Here's the big 'pencil drawers' at the top, they are wide and deep.

And look at these huge drawers on the bottom. This one that is open has the bars for hanging files. There are slots for either letter size or legal-size depending on my needs. I think I will be storing my editioned prints and probably photos and drawings. The drawer next to it is just a big empty drawer about 11" deep 24" wide and 40" deep. That's where we'll hide the body.
Sunday, September 06, 2009
STUDIO COUNTER TOPS
Darrell is giving me a few more half-days to work on my cabinets. Here he is making lots of sawdust, cutting the MDF and putting Lamellos slots in the ends to join the pieces together.
Sunday morning I found him up in the studio putting the mahogany edging on. He was pretty much done with that before we went out for our regular Sunday breakfast and grocery shopping. When we got back he put on the backsplash and finished up.
Then it was my turn to putty the holes, sand it down and put on a coat of clear urethane varnish. I love the golden brown color, with little uneven patches, that the MDF becomes. Over the next several days I will lightly sand and put several more coats on it. This will be a very servicable surface for many years.
You might notice that I put the new chrome handles on the big flat files, they match the handles that were on the other flat files. And, when I get drawers and doors, they will have matching handles also. The doors might be a while in the making, Darrell has to get ready for a few shows he's got coming up soon.
Saturday, August 22, 2009
PROGRESS ON STUDIO AND NEW PORTRAIT
I've spent most of this week putting coats of paint on the studio cabinets and flat files. Here's what it all looks like at this point.
I prefer using oil-based paints on the wood cabinets. Oil can be a pain, but I like the looks and feel of it after its on. And I really enjoy opening up the cupboards to find the nice white finished insides. It makes me feel good! And they are easy to keep clean.
I've learned some good tricks over the years, such as - freezing your roller and brush instead of cleaning them. If I'm going to be painting every day this works much better than dealing with paint thinner. I always wear non-latex latex gloves when painting. I'm using a foam 4" roller and a good China bristle brush. At the end of the day, I wrap the brush in plastic wrap, making sure there are no air bubbles. I do the same with the roller, except I'm using a small plastic bag (originally for dog-doo!). I'm using two colors, so two rollers go into the freezer for the night. The next day I just don the gloves and unwrap the roller, stick it on the handle - good to go.
The last few days I've just been doing the shelves (seen on top of the cabinets) so I don't even need a pan. I just dip the roller into the can and slop it onto the horizontal surface! I did this on the inside of the cabinets, too. I could start on a horizontal surface and get the paint evened out on the roller before I went vertical. Cool, huh?
At the end of the job, I'll just throw these cheap foam rollers away. But, I always take very good care of my good brushes.
And, here are the paintings I've been working on this past week:
This one, Leslie, I touched up and re-worked a few times and I think it's finished now.
The top one is the same picture I posted a few weeks ago. I went back in and in an attempt to even out the color, obliterated most of it! So, I had to then add some color back in. You can see the final version at the bottom. This is Leslie, acrylic on canvas 11" x 14".


Since I am kinda into portraits at the moment, I thought I'd start another self-portrait. Here it is after a few days work. It's VERY ROUGH. As you can see I like to go in and first describe the lights and darks and some rough patches of color.
Later I will go in and even it out and make adjustments. [Hopefully I won't ruin it!] I do tend to overwork things. It's a constant battle for me to loosen up and let things be!
Anyway, this is Self 2009, acrylic on canvas 11" x 14", just the beginning!

Subscribe to:
Posts (Atom)